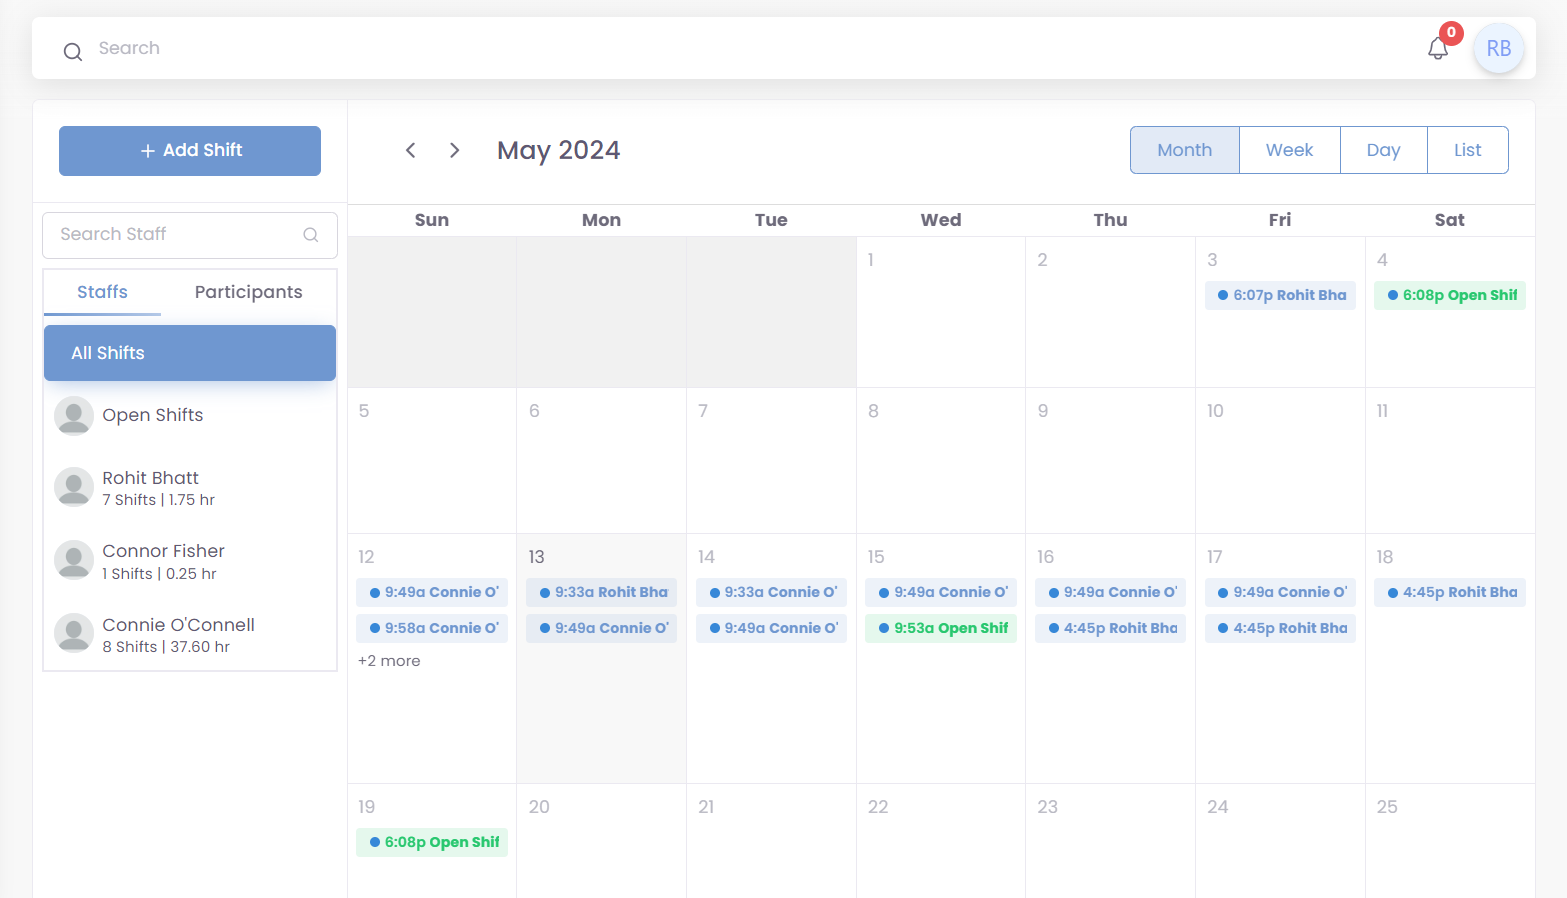
The Calendar section provides a centralized view of your shifts and allows you to add, edit, and view them in various formats.
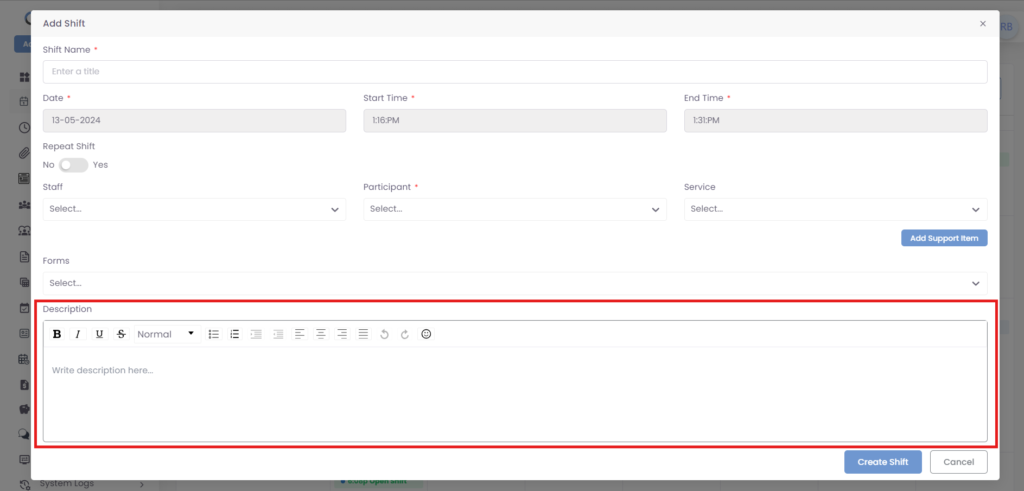
Add Shift:
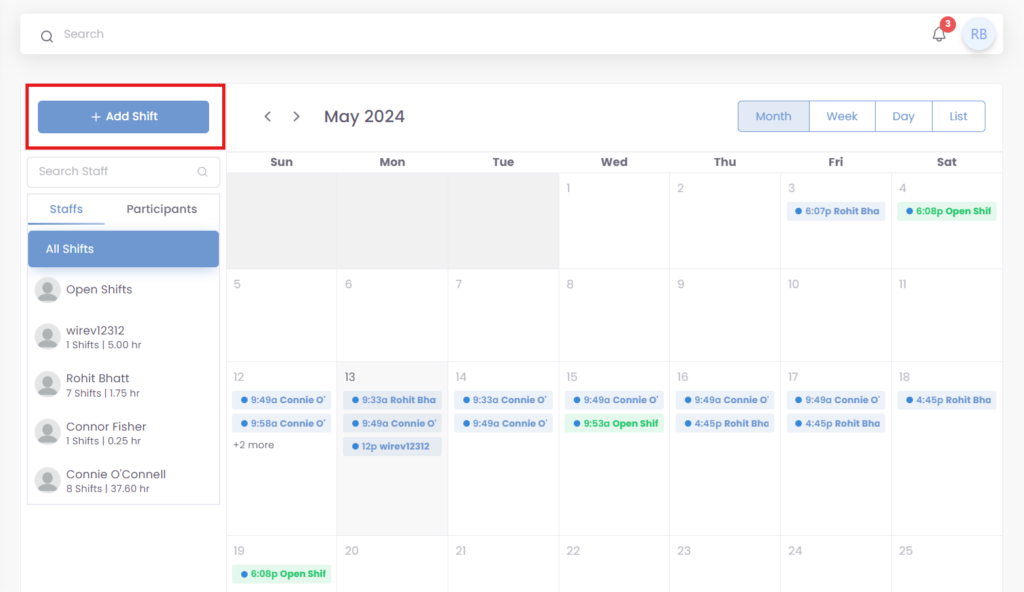
To create a new shift, click the “Add Shift” button.
Here are the fields you will need to fill out to create a shift:
Date: The default date is already filled. Click on date field, to choose select date from calendar.

Start Time: This is already filled in with default time. Click on the field. This opens a time interface where you can choose the desired start time for the shift.
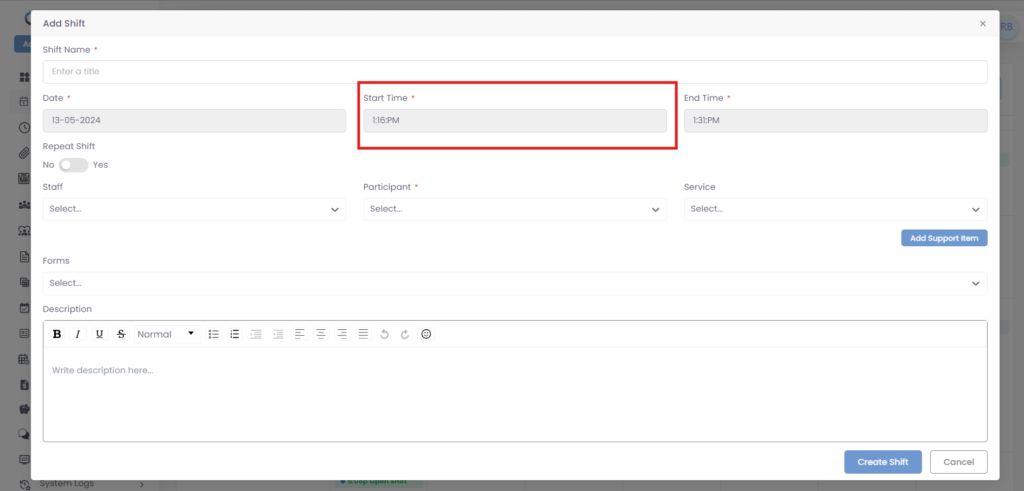
End Time: This is already filled in with default time. Click on the field. This opens a calendar interface where you can choose the desired End time for the shift.
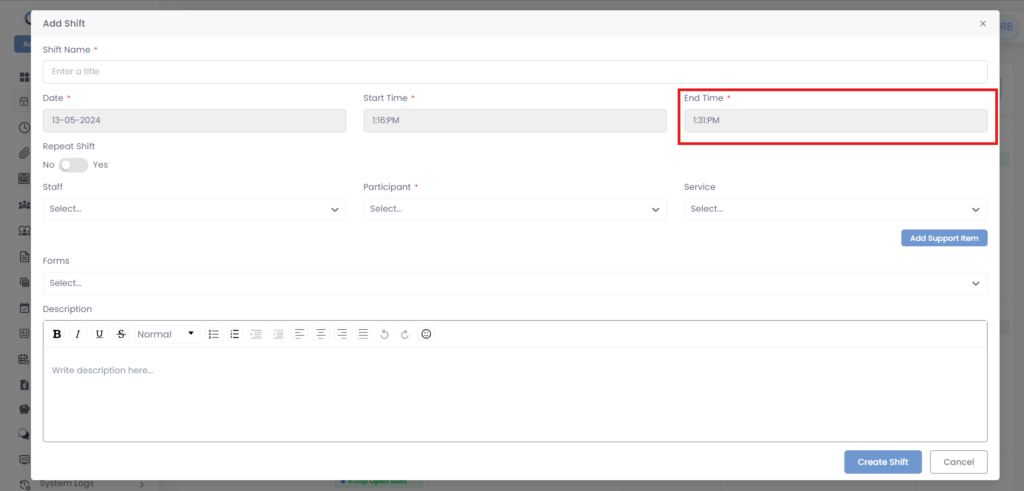
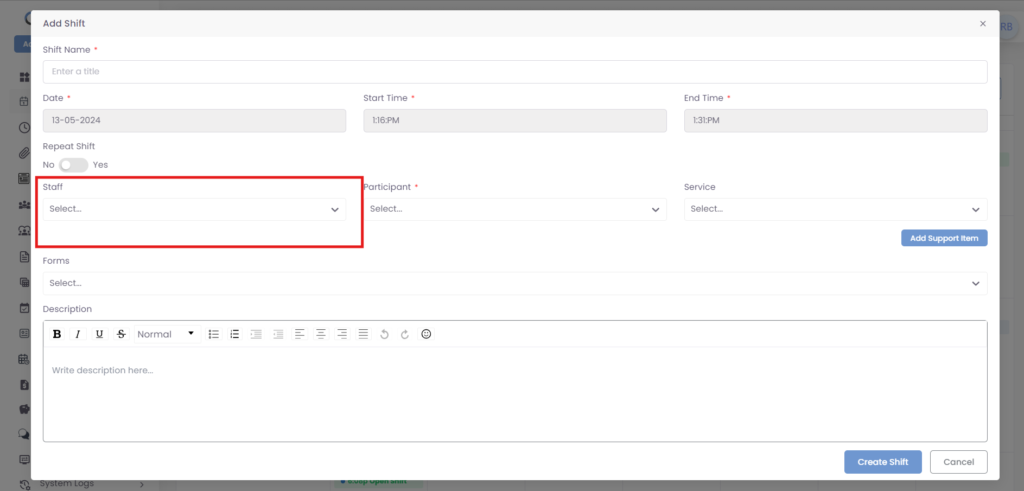
Staff: You can select the staff member who will be working for this shift from a dropdown menu.
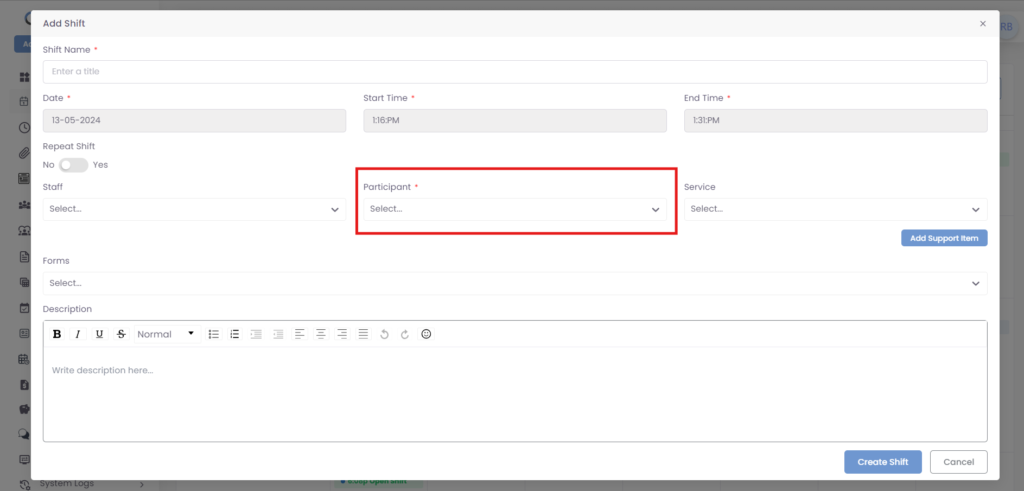
Participant: You can select the participant who will be receiving the service provided by your organization.
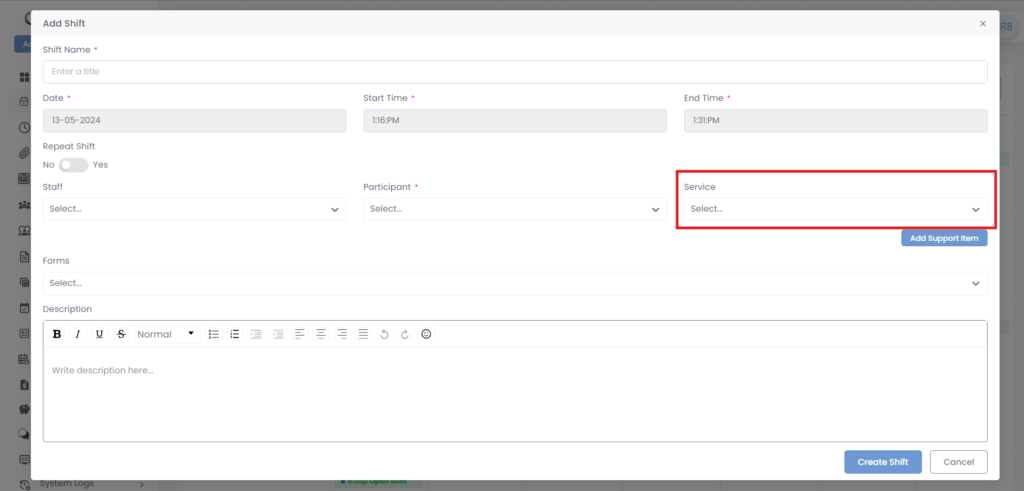
Service: You can select the service that will be provided during this shift from a dropdown menu.
Add Support Item: Click on “Add Support Item” button, this button allows you to add an item to support the shift.
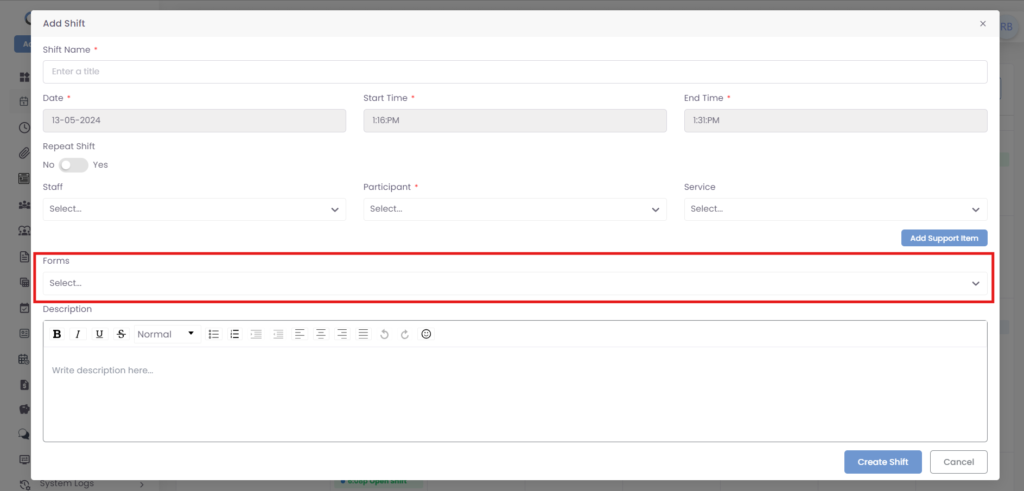
Forms: You can select a form from a dropdown menu. This form may be required to be filled out before the shift.
Description: You can enter a description of the shift in this text box.
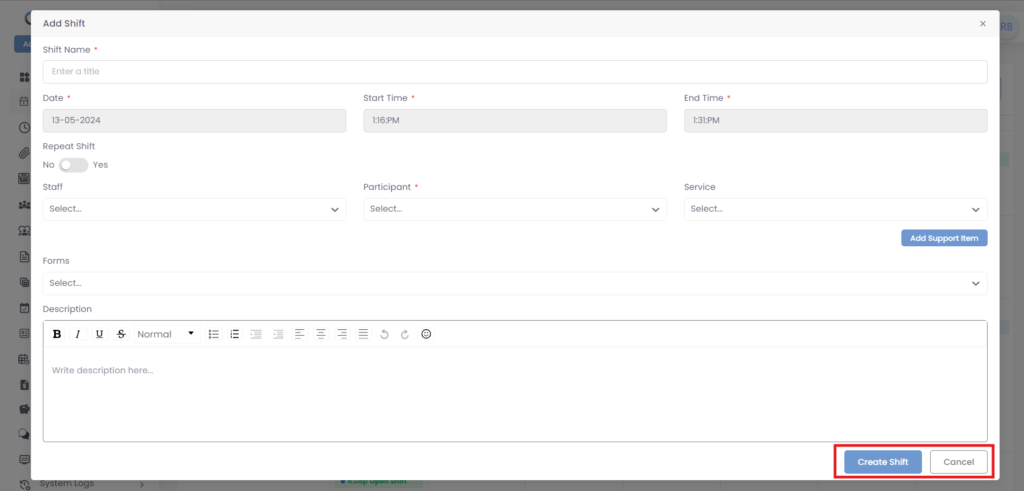
Once you have filled in all of the required fields, you can click the “Create Shift” button to create the shift.
Was this helpful?
1 / 0